Davy
-
Posts
3,924 -
Joined
-
Last visited
-
Days Won
259
Content Type
Profiles
Forums
Events
Blogs
Gallery
Everything posted by Davy
-
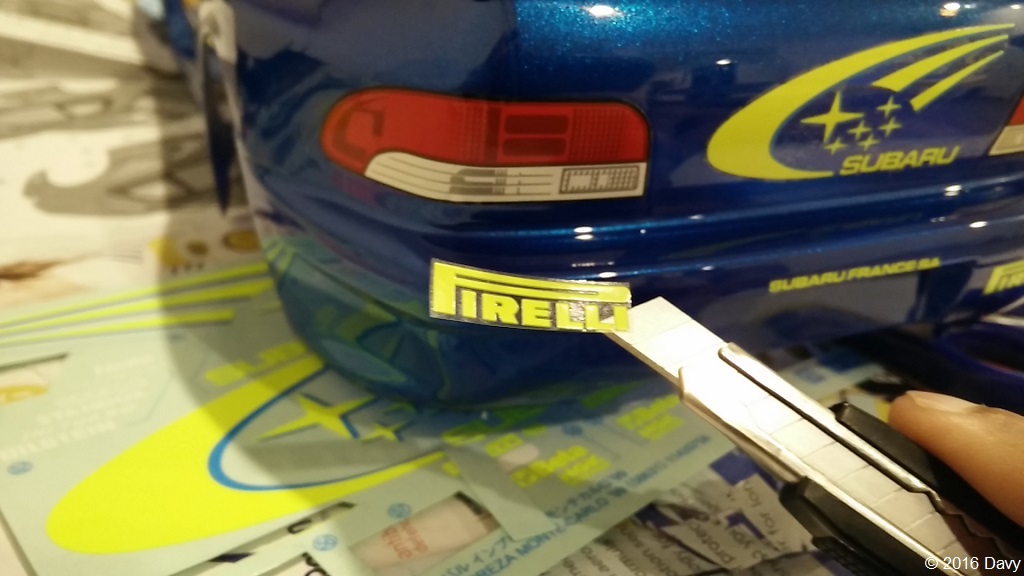
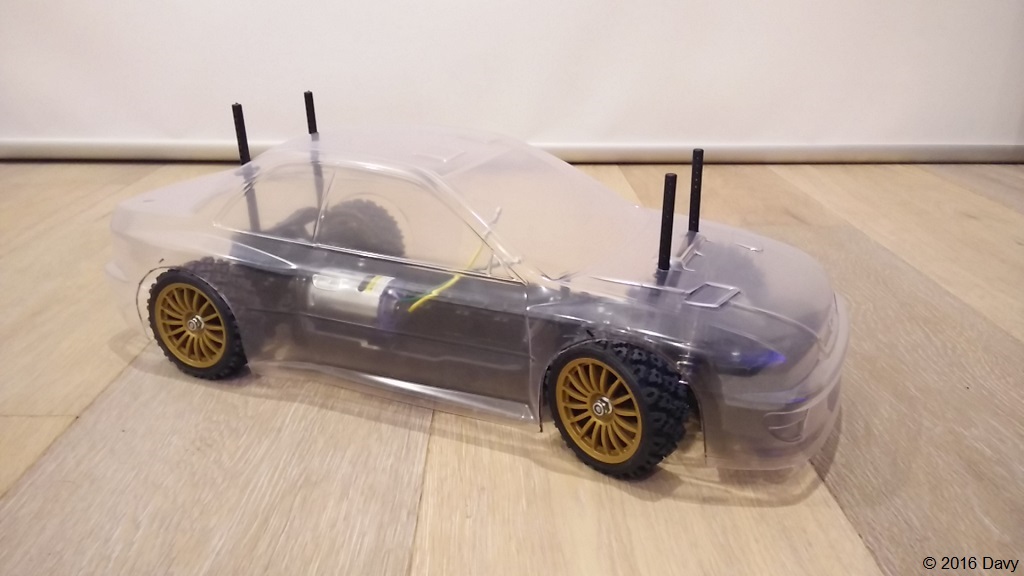
While the forum was offline, I actually finished my build! So after the paint job, the next part was to stick the decals and stuff on the body shell. This took the longest of all. A good pair of scissors and a knife is essential for this part. Some stickers needed to be positioned perfectly, so I used tabs of masking tape to position them first and then peeled off the back of the sticker from underneath. Made it much easier to paste them. For smaller decals, I stuck them onto the craft knife and positioned them on the body: Halfway there... Note how different the colour of the spoiler is in the above photo. I will paint this again. And we're done! I didn't paste all decals to be honest. There were some that I left out because I didn't want to covert the whole car with stickers. I might change my mind later. Here's the actual car for comparison: Will share photos of how the electrics went in next.


-
Awesome stuff MADZ! This is great! Looks like we had quite an old version of IPS forum. I had trouble logging in because my display name (Davy) was not what I have been using so far to login (I may have requested my display name to be changed in the past). And this new version did not let me in when I used my old user name. I just tried "Davy" as the user name and it worked. If there are users who used a different user name from their display name on the forum, they'll probably have the same issue as me I think. Also, I think previous user attachment images are gone from the Profile > My Attachments. Some users still use this and I saw a few broken links while browsing. But wow, the attachment quota now is nearly 1 gb! Earlier it was just a few megabytes. Anyway, the first thing I checked was whether the search function is better than the old version and guess what? It is! At least now we can hope members will search before posting new topics. Great work again to MADZ and the AL team!
-
That moment when the previous owner of your car, pulls up next to you at a red light and says "Hey mate, how's the car?"
-
While paying close attention to the advice by others, I think you should get your clutch checked out as well. Although your car has a cable operated clutch, "hot spots" on the pressure plate and flywheel can cause clutch slippage when the engine and transmission is hot. I was once faced with a situation where a leaky crankshaft oil seal caused oil to come into contact with the clutch plate and cause slippage. What was done as part of the clutch inspection? Was your gearbox taken down to inspect the clutch? You can do a simple check to determine if your clutch is actually slipping. When the issue pops up, - Bring the car to a complete stop - With the engine still running, press the clutch and shift into third gear - Try to take off as you would do if the car was on first gear If the car stalls, then your clutch is probably OK. If the RPM increases and the car starts to move, then you have a slipping clutch. I suggest this because you say that you have control of the vibration when you ease up on the clutch.
-
The paint job went pretty well. After masking the windows, I sprayed three even coats of blue. A light coat at first, followed by a bit thicker coat and then the final one being pretty thick. First coat... And the final coat The spoiler. Since I used the same colour that was used for the body (ignoring the manual's instructions that said, "use a different colour"), the spoiler appeared to be different from the rest of the body. I might have to spray it with a few coats of clear to get the same shine as the body. Rear view mirror painted in semi-gloss black Unmasked the windows and painted them in the smokey black colour. Looks like all windows are tinted now. Next was the biggest surprise. I removed the polythene on the outside after the paint dried up and dang!! look at that shine! A few more shots with the painted body mounted on the chassis Really happy with how the paint job turned out...


-
Posting this again since all posts made after June 30th are gone after the recent forum upgrade attempt. So I thought of moving on to bodywork since I wanted to get the body painted during the weekend. I marked the body using a permanent marker and then used a pair of scissors and the crafting knife to cut the excess plastic out. Cutting along the wheel arches was the most difficult. After that I installed the body mounting posts onto the chassis and positioned the body to where it would sit. Although this is a rally car, I didn't want it sitting higher than normal, so I settled for a 5mm gap between the wheel arch and the tyre. This way the front wheels were able to turn left and right without touching the body even under full suspension travel. I washed the body with soap and water as instructed in the manual and then masked the windows. I also got the charger and a battery. Having heard of horror stories of batteries catching fire and exploding, I decided to buy a good charger. Went for a SkyRC B6AC + V2. Capable of charging/discharging NiMH, LiPo, NiCd and even balancing LiPos. The battery is a VENOM 5000mAh 7.2V NiMH. The charger came with all sorts of adapter cables for different makes of RCs. The charger even has a micro USB port to connect to the PC and monitor stats on a PC app. The battery also came with different adapters, so I can use this battery on almost any car that supports 7.2V NiMH. Running a series of charge > discharge cycles on the battery.


-
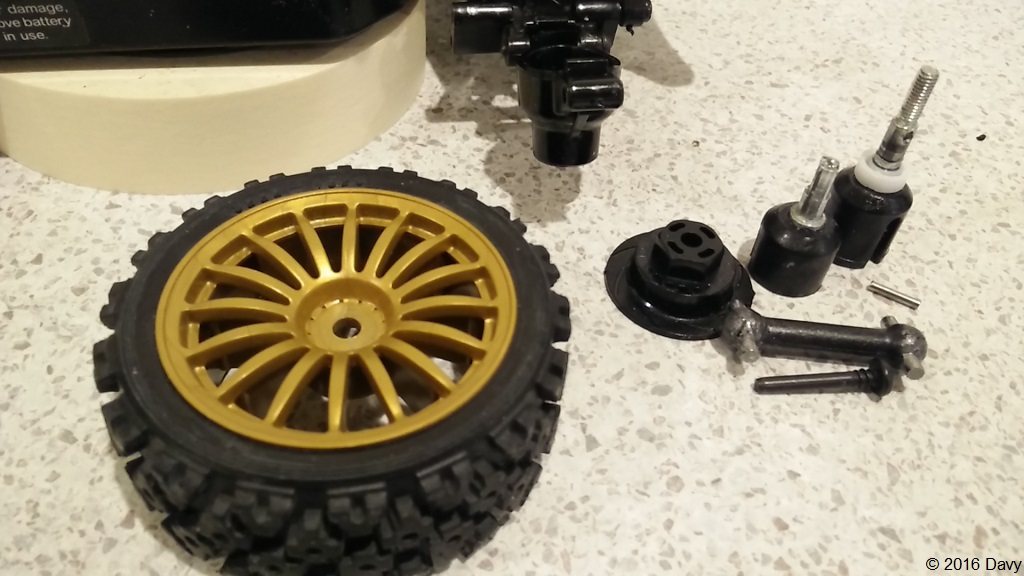
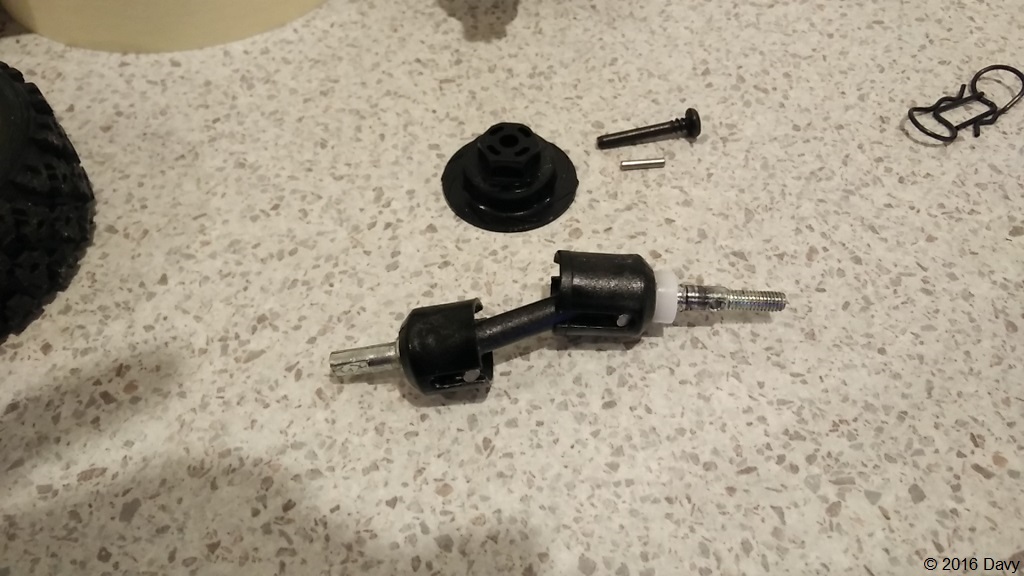
Thanks mate. The springs on the stock shocks are really stiff, so I'll definitely be switching to a good set of shocks. And yes, the plastic bushes need to go. I also noticed that the drive shafts have a bit of horizontal free play near the wheels which I don't like because it can cause the wheels to wobble. There are aftermarket upgrade kits which cost more. Like this one by Yeah Racing. Still thinking which way to go. This one here costs more than the car itself.
-
The servo, receiver and the ESC go on the side of the motor. So the space on the other side of the prop shaft is totally for the battery.
-
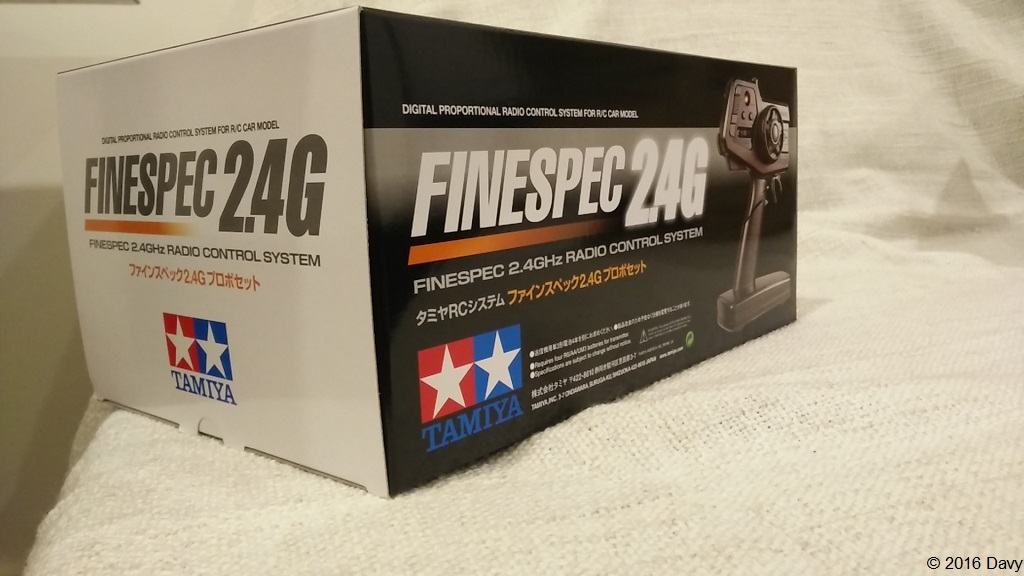
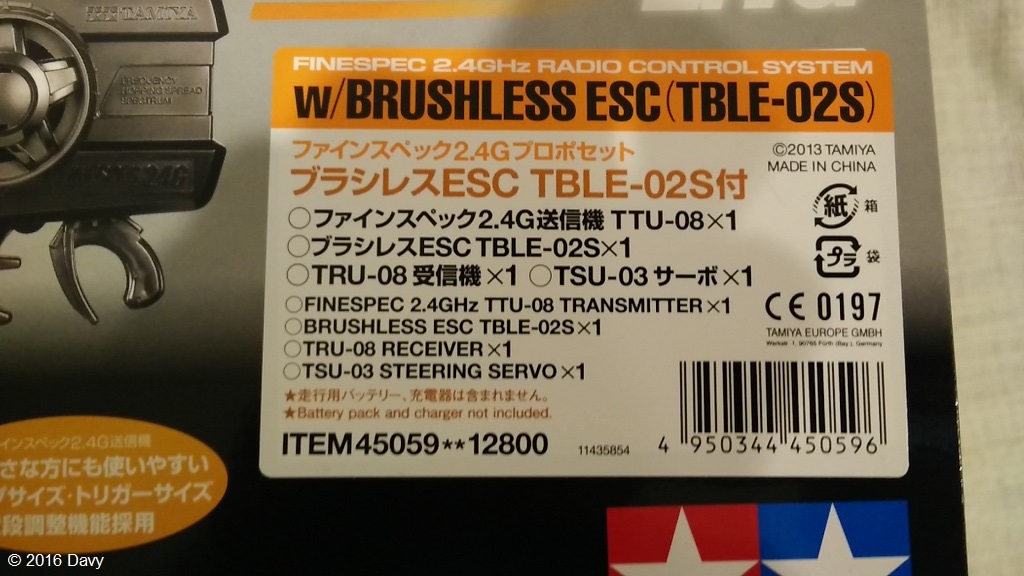
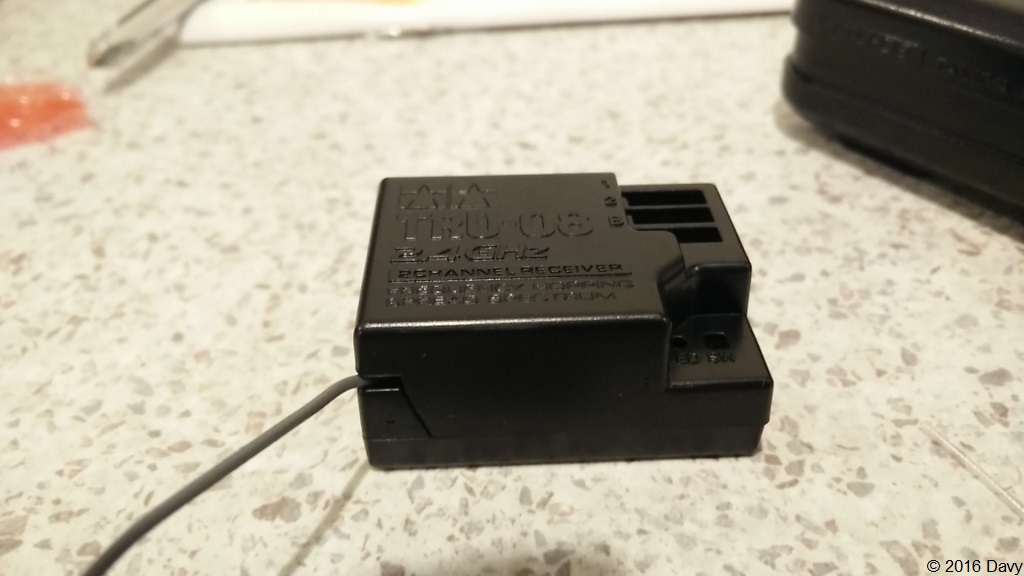
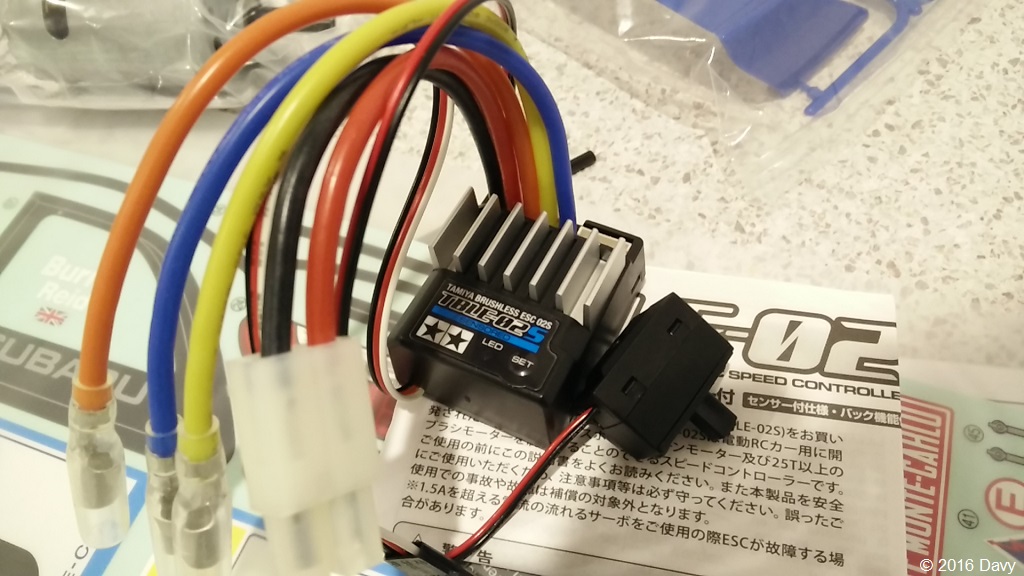
I also got the Finespec 2.4GHz Transmitter system. This kit has an ECS too. So I've now got a spare TBLE-02S ESC. The ESC that came with the car is set to brushed mode off the factory, and the one that came with the transmitter is in brushless mode. The setting (amongst other settings) can be modified. The transmitter in the box (ESC and servo in the bubble wrapped bags). The Tamiya TRU-08 receiver: The Tamiya TSU-03 steering servo. I have installed the arm that came with the car onto the server here. Electrics will go into the car next. I've got to buy a battery for the car and a charger. Thinking of getting a 5000mAh NiMH battery with a good charger that allows balancing of LiPo batteries as well.


-
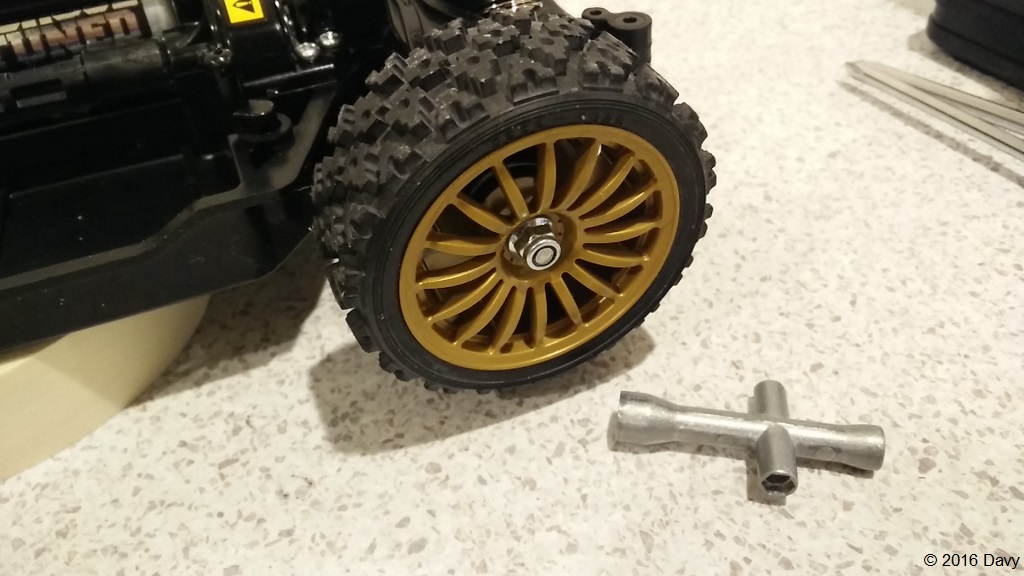
Shocks assembled. Each strut came in 5 separate parts. Assembling the drive shafts... And we have something that looks like a complete chassis...


-
Rumesh is right. Your car has a manual choke, so it wouldn't be trying to automatically operate like the IACV on modern cars do. When you accelerate from a standstill on first gear, does the car still vibrate if you release the clutch slowly compared to normal?
-
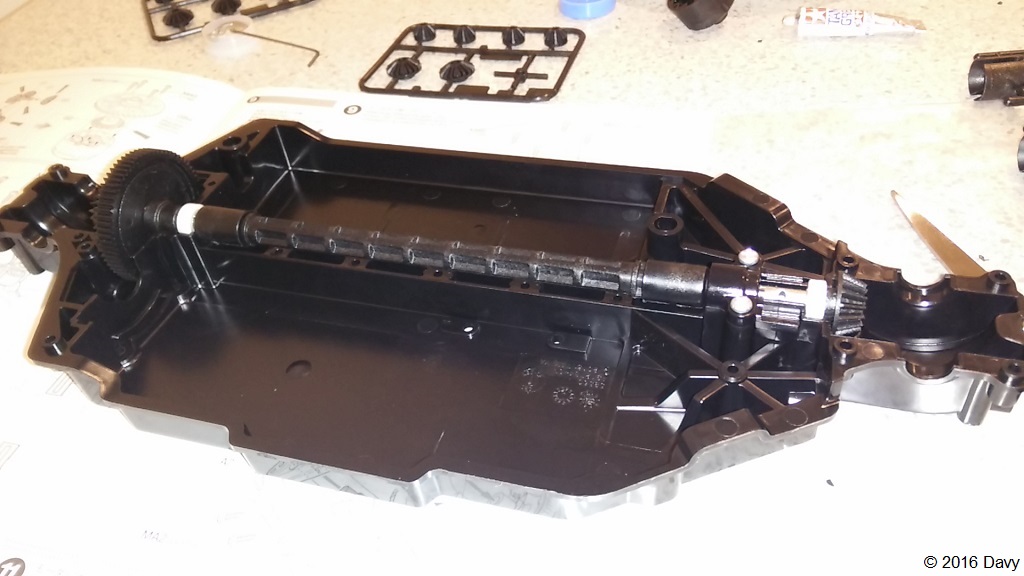
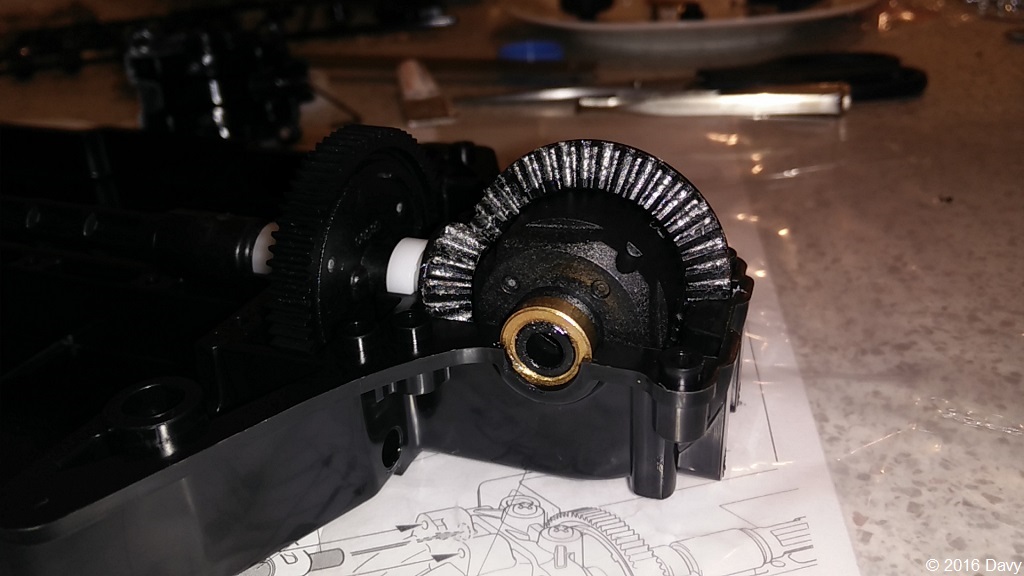
I started the build! The link below is to the instruction manual I’m following. Gives a clear picture about each step of the build since I couldn’t capture each step. Assembly manual + body specific manual (8mb PDF) The first step is to assemble the spur gear at the back of the car and then the propeller shaft. Lube the plastic bearings with grease and then put ‘em together. Note that the prop shaft is plastic too – something that I didn’t like because there’s actually a bit of flex to it. Then came the differentials – both front and rear. Filled the diff housing with a liberal amount of grease. The kit came with two types of grease. Regular grease for bearings and the diff and Anti-Wear grease for suspension links and even between the prop shaft and the spur gear. Next – the motor. The motor itself came with a 19T spur gear, but the kit had a 17T one. The instructions for the car said use the 19T one, so that was what went in. Here’s the motor installed. Suspension arms were next. And after a couple of hours, this is what I ended up with. Done for the day


-
Very neat! Well done!
-
That is sick terra! Very nice! Was so tempted to go for a Traxxas Stampede 4x4 VXL, but even the 1/10 scale ones are so expensive! Is that graphic on the body a sticker or a very complex paint job involving three colours? Shhhhh! People will hear! But yeah, couldn't help it. Just glad I didn't buy one of everything from the "tools" section of the hobby shop.
-
The photo I've shared is of the ESC, but yeah, the receiver is pretty much the same size as well. The receiver circuit in my Ford F-150 is also pretty huge. I guess that's the difference between the 90s and today. Would love to see your 911 Targa. Please share some photos in this thread if possible.
-
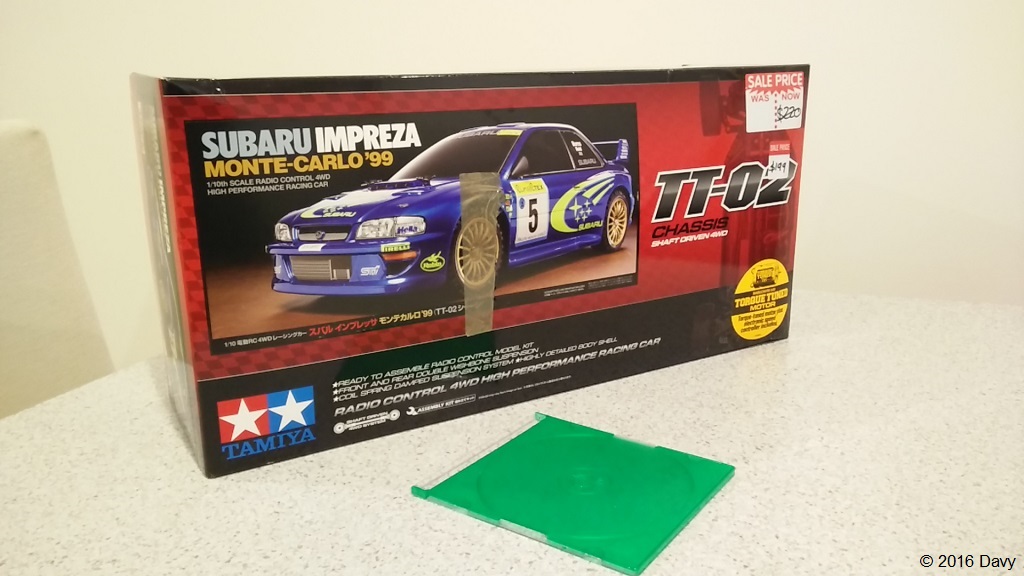
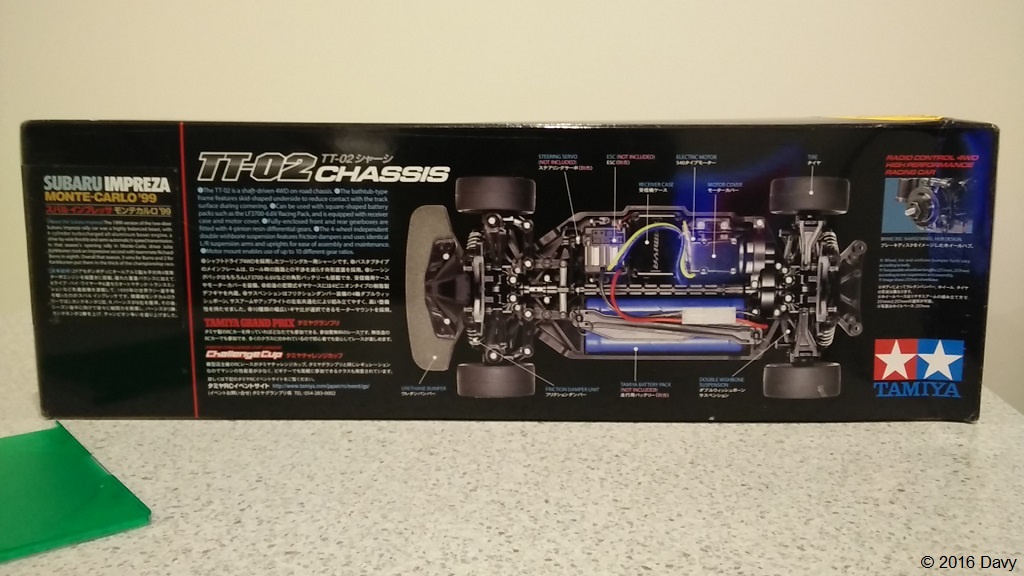
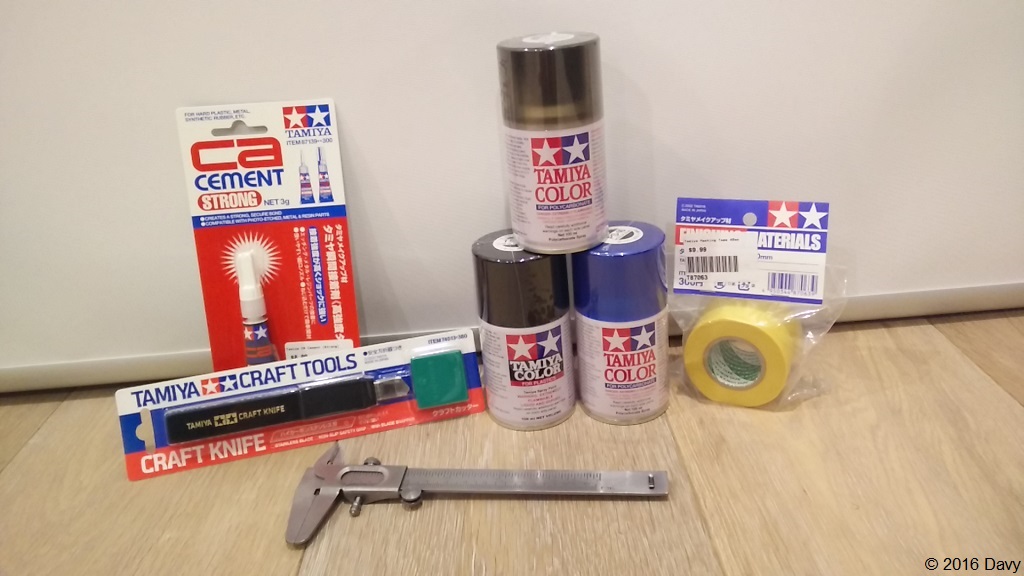
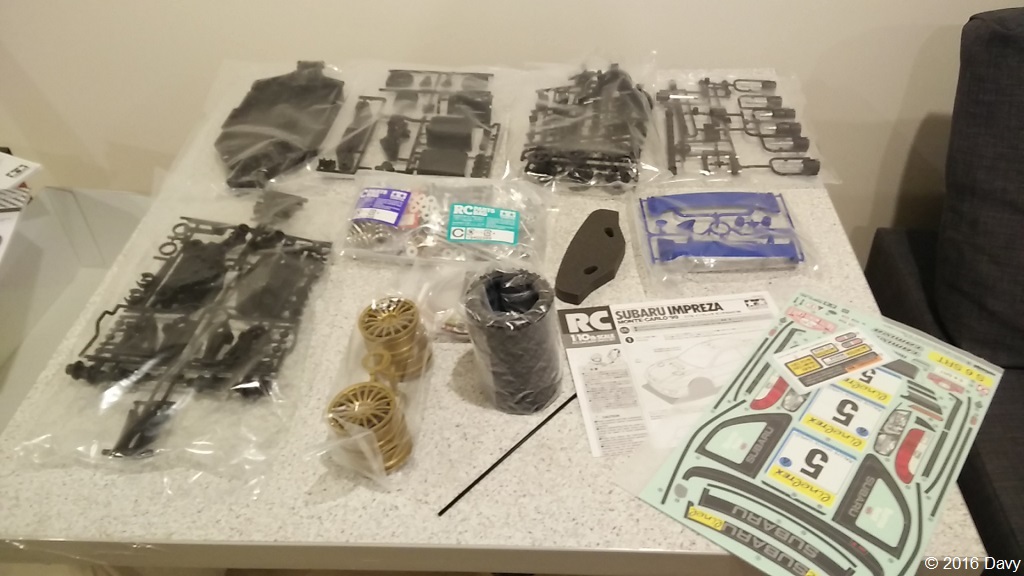
Hi guys, I’ve been contemplating whether to share this build, and when I had a chat with trinity, both of us agreed that the forum could use an RC build thread. So here goes… Oh and for those of you who are keen on sharing your RC builds, you are most welcome to use this thread. I have created post #1 as a placeholder to add direct links to other builds that will be shared later on this thread. Been in love with remote controlled gadgets ever since I was little and I still have most of the RC cars that were gifted to me by my father. Among them is a 1:12 scale Ford F-150 monster truck. During a time when PCs and mobile phones were not as common, this truck kept me occupied for years on. Back in the day, you couldn’t really get hobby grade RC vehicles in Sri Lanka. So the truck was all I had. The thought of buying an RC car and building it on my own was always at the back of my mind, but I couldn’t really do it for various reasons. Until now… Researching and finding stuff about RC vehicles made me develop a soft spot for Tamiya. I wanted an assembly kit, so that I can build the car myself and do all future upgrades. So I got myself a Tamiya TT-02 kit. The car is a limited edition ’99 Subaru Impreza Monte Carlo. Scale 1:10. More info about this car Unboxed! The kit has about 8 part trees, 3 parts bags and the main chassis, external accessories of the car (spoiler, rear view mirror) and the decal sticker sheets.Most of the gears, bearings and linkages are hard plastic out of the box, but there are many “Hop Ups” from Tamiya itself and even from third parties like “Yeah Racing” and “GPM”. Since this is my first Tamiya kit, I’m going to stick to the stock parts for now and purchase an aluminium upgrade kit at a later point in time. The kit has a set or Rally spec tyres with the gorgeous Subaru gold wheels. The 1999 Subaru Impreza STi body. This is a regular polycarbonate body. It comes with a very thin polythene insulation on the outside to protect it from overspray during painting. Subaru branded decals to go on the car. The external trims and stuff are also in a separate decal sheet. They need to be carefully cut out and pasted. Some delicate and precision work involved. The 540 Torque Tuned brushed motor. And the ESC TBLE-02S [More info]. Note that the ESC is brushed and brushless capable, really nice of Tamiya to include a brushless capable ESC in the kit. I might go brushless sometime in the future. The assembly kit does not come with transmitter, receiver, battery, charger and steering servo, so I had to source them separately. Placed an order for a Tamiya 2.4GHz system [This one], and it’s on the way from Japan. I’m expecting it to arrive before I finish the build. I’ll be sourcing the battery and charger from a hobby shop. Paints are also not included in the box, so I purchased them separately even before the car arrived. 4 separate colours were needed. Main body colour, a different metallic blue for the spoiler, Matt black for the side mirror and a smoke colour for the windows. Thinking of painting the spoiler also in the same colour used for the body, hence the three paint cans. Other things I bought are a Tamiya craft knife, CA cement to paste the wheels (not sure I will use this), Tamiya masking tape and a Vernier calliper. Yes, I have a mini Tamiya fetish already. Stay tuned for the build... EDIT: Continued on post #13


-
Welcome to the AutoLanka RC build thread! List of Builds: 1. Tamiya TT-02 '99 Subaru Impreza Monte Carlo Build by Davy 2. Traxxas 1/8 Truck Volkswagen Baja Bug Build by terrabytetango 3. Vintage 1/12 Ford F-150 Restoration by Davy (coming soon) 4. Traxxas TRX4 Land Rover Defender by Davy Other RC related discussions: http://forum.autolanka.com/topic/9445-remote-control-cars/ http://forum.autolanka.com/topic/2148-show-off-ur-rc-cars/ (Unfortunately, most old links here are broken. But please use this thread to share photos of your RC cars)
-
What's disappointing to see is even regular members continuing to discuss the same things all over again without directing the OP to the relevant threads (OP on this thread hasn't even responded after post #9). The forum is only being made more cluttered with redundant threads this way. When a newbie asks a question, the first thing members should ideally do is try to find them the answer on the forum without going "oh I know the answer to that!". AutoLanka is almost a decade old, and we have discussed pretty much everything car related + many other topics! No offence to anyone.
-
Ted, stop opening a new thread for every question that pops into your mind about the car.
-

Lancer Or Axio? Update: Bought A Lancer! (Aka The B.r.a.t.t. Thread)
Davy replied to Bracket's question in Car Buying Information
Oh that totally slipped my mind. Yes, they're all probably using an Octane Booster. -
Already discussed http://forum.autolanka.com/topic/17379-the-all-new-mazda-2-2016sedan/ And it's Skyactiv, not Skydrive. Current technology is not mature enough for Skydrive.
-
Yes the weight of the entire vehicle (including wheels) is considered when calculating power-to-weight ratio. And yes, alloy wheels are manufactured using lighter material, so the total weight of the vehicle usually decreases if steel rims are substituted with alloys. This means the power-to-weight ratio increases. What exactly is your concern?
-
To answer your first question, the normal behaviour is that there is little to no change in RPM when the AC comes on. The idle control mechanism should stabilise the engine RPM as the compressor comes on and goes off. So no, it shouldn't rise to 1000 and come back down every time the AC comes on.
-
Lancer Or Axio? Update: Bought A Lancer! (Aka The B.r.a.t.t. Thread)
Davy replied to Bracket's question in Car Buying Information
When a higher octane fuel is used, the piston is able to compress the air/fuel mixture so that only a small portion of the cylinder wall is exposed to the combustion. But with the use of lower octane fuel, the combustion happens when the piston is further down in the cylinder, exposing more of the cylinder wall to the extreme heat. This can cause the engine to overheat. And this is just one of the symptoms. Also, If the car is a bit old and has carbon deposits in the combustion chamber, knocking will happen regardless of the knock sensor trying to do it's job. Other issues that I can think of is premature wearing of exhaust valves, white smoke and spark plug failure. The turbo of the Evo kicks in at about 2500 RPM, so if these guys stepped on it a little bit with regular petrol, I'm pretty sure they would have been able to feel the car struggling.- 800 replies
-
- 1
-

-
- toyota
- mitsubishi
- (and 8 more)
-
Lancer Or Axio? Update: Bought A Lancer! (Aka The B.r.a.t.t. Thread)
Davy replied to Bracket's question in Car Buying Information
Well, God bless that poor Evo. They didn't notice any issues because the knock sensor retards timing of the engine to prevent the engine from knocking. The car will of course run smoothly under regular driving, but that doesn't mean the engine is working at it's best efficiency. In fact, continuous usage will probably ruin the engine. By the way, most of what is mentioned in that article is utter bullsh!t, starting from the 291 brake horsepower to the 5.9 turning radius and the 9 speaker system (when there is actually only 7) to name a few.- 800 replies
-
- 1
-
-
- toyota
- mitsubishi
- (and 8 more)