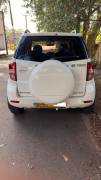
jdnet Posted December 4, 2010 Share Posted December 4, 2010 Here's another DIY for anyone who may have scratched or sticking windows. The reason for me posting all the DIY/hot-to articles recently is because im in the process of restoring everything in the tribute. I'm waiting on some mechanical parts to arrive so I thoughts I would handle the rest of the stuff during that time. If you want me to post infor on changing the mechanical parts just let me know. I doubt that there's another tribute owner so I won't post that info unless requested. Also if you want be to stop making a million diy posts please do let me know. If you want more please comment and also share your views if ou feelyou have a better way around things. Anyway, when I bought the tribute I noticed that the rear windows were sticking and all four windows up front were scratched. I decided to have a look today to see what the problem was. What I found was the weather stripping coated in sand and dirt that almost looked like mud. If you have the same problem or are noticing a few scratches on your windows it would help to check your weather stripping. It would also be good preventative maintainence too. To remove the outer weather stripping on the windows simply take a flat screw driver and wedge it between the weather stripping and the metal on the door, taking care not to bend the weather stripping or scratch the door. Pry it upwards and once you have a bit of it off the door just pull the rest out with your hand. One thing you should do is to make sure you dont bend the weather stripping. After you have removed it just wash it down under a tap and use some dish washing soap to wash the side that makes contact with the window.Just gently rub the soap in with your fingers and don't scrub. Scrubbing will damage the soft suede like material that makes contact with the window. Once you are done cleaning all four just install them right away. You could let it dry but it's really not needed. Before installing make sure you clean the area where the weather stripping was. You would notice a lot of dirt. After your done clean the windows too. Here are some pics. 1 Quote Link to comment Share on other sites More sharing options...
jdnet Posted December 4, 2010 Author Share Posted December 4, 2010 for those of you who may not know what you are looking at in the pics. The gray strip that resembles silicone at the top of the picture is actually a pretty deep layer of dirt. Quote Link to comment Share on other sites More sharing options...
mazdaspeed Posted December 4, 2010 Share Posted December 4, 2010 Great write up Jdnet - Keep it up Quote Link to comment Share on other sites More sharing options...
jdnet Posted December 5, 2010 Author Share Posted December 5, 2010 On 12/4/2010 at 6:35 PM, mazdaspeed said: Great write up Jdnet - Keep it up Thanks Quote Link to comment Share on other sites More sharing options...
Chathurike Posted December 5, 2010 Share Posted December 5, 2010 valuable stuff mate !! Quote Link to comment Share on other sites More sharing options...
lasa Posted August 9, 2011 Share Posted August 9, 2011 On 12/5/2010 at 6:36 AM, jdnet said: Thanks Mate, Any idea of removing scratch marks from the window? Both front windows in my car have scratch marks from inside(which got visible after removing tint). Any suggestion? Thx Quote Link to comment Share on other sites More sharing options...
Recommended Posts
Join the conversation
You can post now and register later. If you have an account, sign in now to post with your account.